Lisa's Filled Yeast Loaves

If you have company staying the night, and you want to make a seriously delicious breakfast...you gotta try these. "Lisa" is my Aunt Lisa--another great cook in my family. Her filled yeast loaves are a danish that will feed about 10 people. Remember to start it the night before, so that your bread will have time to rise. You'll also need to let the dough rise in the morning, so aim for a late breakfast. My friends and I spent the weekend at a cabin recently and I made these. It was a great start to a relaxing Saturday. Serve these with some fresh fruit and, as my mom likes to say, you'll be the hostess with mostest, guaranteed.


Bread 
8 ounces sour cream
1/2 cup sugar
1 teaspoon salt
1/2 cup melted butter
2 packages dry yeast
1/2 cup warm water
2 eggs, beaten
4 cups plain flour (might need 1/2 cup or more for altitude adjustment)

In a sauce pan, heat sour cream over low heat. Stir in sugar, salt and butter. Cool to lukewarm. Meanwhile, sprinkle the yeast over warm water and let dissolve, stir if needed. Add this to sour cream mixture and combine with beaten eggs and flour. Mix well. Cover tightly. Refrigerate overnight.

Filling
8 ounces cream cheese (room temperature, cut into chunks)
3/4 cup sugar
1 egg, beaten
1/8 teaspoon salt
2 teaspoons vanilla

Mix all of the above together. Take the dough out and divide into four equal parts. Roll each into a rectangle that measure approximately 12"x8".  Spread 1/4 of filling on each of the rectangles. Leave edges clear of filling. Roll into a jelly roll. Tuck ends under.

Place on cook sheet, seam side down. Repair any tares that may occur. Use a spatula and make angular slits across the top of each roll. Cover and let rise in a warm place until double in size (30min - an hour). Bake for 15 minutes, (until light brown) at 375 degrees.

Glaze
1 cup powdered sugar
1 teaspoon milk
1 teaspoon vanilla

Mix well in a small bowl. Pour over each roll after they bake. Serve immediately.

Read more...

The Best Thing Since Chopped Onions....

Let me just tell you that this little contraption has become my best friend in the kitchen. It definitely deserves a shout-out because I use it for almost every meal. If you're like me, and hate the thought of chopping up onions then you'll love the Progressive Onion Chopper. It does the job for you in less than a minute. No more getting all emotional over a stupid onion! Just cut the peel off, cut the onion in half, place it on the chopper...and you're done! It even has a measuring guide so you know how much you have. Brilliant I tell you! Here are some step-by-step pics of just how easy it is.

1) Peel the onion, and wish it farewell. 


2) Hi-yah! (this usually takes both hands...for me)

3) Open the top and marvel at how easy that was.

4) Measure and use! No tears allowed!

I use this for onions, peppers, celery, carrots, and whatever else needs to be chopped. It also comes with a lid-cleaning tool AND it's all dishwasher safe which makes for easy clean up! Just trying to share the love here...this thing is awesome!

Read more...

Blueberry Scones

This isn't the simplest recipe...but it is oh so good! My youngest sister was in town this weekend and we spent Saturday morning making these scones. It was definitely more fun to cook with her. She makes everything an adventure, and she is a great helper! So on your next free Saturday morning, get out your apron and rolling pin and get ready to impress yourself! (We took plenty of pictures during this endeavor...hopefully you enjoy them).


Blueberry Scones
2 sticks butter (frozen is best)
1 1/2 cups fresh blueberries (half a pint...put these in the freezer too)
1/2 cup whole milk
1/2 cup sour cream
2 cups unbleached all-purpose flour (we used bleached...oops)
--plus additional flour for work surface
1/2 cup sugar
--plus 1 tbsp to sprinkle on top
2 tsp baking powder
1/4 tsp salt
1 tsp grated lemon zest
Parchment paper

Alright here goes...
1. Adjust the oven rack to middle position and preheat oven to 425 degrees.  
2. Score and remove half the wrapper of each stick of butter. Grate unwrapped ends on large holes of box grater. You remove half of the wrapper so you can hold one end, but in total you should only grate one stick (8 tablespoons of butter). Melt 2 tablespoons of the ungrated butter and set aside. Save the remaining 6 tablespoons for another use.


3. Whisk together milk and sour cream in a medium bowl, refrigerate until needed. Whisk flour, 1/2 cup of sugar, baking powder, baking soda, salt, and lemon zest in a medium bowl. Add the grated butter to flour mixture and toss with fingers until thoroughly coated.


4. Add milk mixture to flour: fold with spatula until just combined. With rubber spatula, transfer dough to a work surface that has been liberally floured. Dust surface of dough with flour...with floured hands. (I warned you about the apron!) Knead dough 6 to 8 times, until it just holds together in ragged ball, adding flour as needed to prevent sticking.

5. Roll dough into approximate 12-inch square. Fold dough into thirds like a letter, use a metal spatula (or something similar) to release dough if it sticks to counter top.  Lift short ends of dough and fold into thirds again to form approximate 4-inch square. Transfer dough to plate lightly dusted with flour and chill in freezer for 5-10 minutes.

6. Transfer dough to floured work surface and roll into approximate 12-inch square again. Sprinkle blueberries evenly over surface of dough. (Note: if the blueberry container is a little difficult to open after being in the freezer...do not squeeze the box...or blueberries will fly ALL OVER THE FLOOR).


Don't worry, we didn't reuse these that hit the floor, although it crossed my mind. I snuck some of them in Elise's cereal the next day. HA!

At this point you'll see why it helps to freeze the blueberries first, since you have to press them into the dough.

Using your metal spatula, loosen the dough from the work surface and roll the dough, pressing to form a tight log. Lay seam-side down and press log into 12x4 inch rectangle.

Using a sharp, floured knife, cut the rectangle crosswise into 4 equal rectangles. Then cut each rectangle diagonally to form 2 triangles and transfer to parchment-lined baking sheet.


7. Brush tops with melted butter and sprinkle with remaining sugar. Bake until tops and bottoms are golden brown (about 18-25 minutes). Transfer to wire rack and let cool 10 minutes before serving. Serve with a fresh cup of coffee. Mmmmmmmmmm....

Read more...

Chicken ala Murphy

This recipe comes from a family friend, whom we like to call Aunt Estelle. Something she just "threw together". It's one of my favorite recipes in my cookbook! I added the mushrooms, because I'm a mushroom fanatic, so you can leave them out if you want to. I've cooked it several times, but most recently was at the Hembree's house in Flo-rida. In reality, Kristen did the cooking, and it was awesome! She's such a great little wifey. So here is a super easy, super yummy chicken dish from Mississippi!


Chicken ala Murphy
6 chicken breasts
1/2 cup flour
Salt and pepper
3/4 stick of butter
1 package pre-sliced, pre-washed mushrooms
2 cups green onions (yep, 2 cups)
1 can cream of mushroom soup
1 can golden mushroom soup
1/2 cup water

Mix the soups and water together in a bowl, set aside. Salt, pepper, and lightly flour the chicken. Melt the butter in a large frying pan, brown the chicken in the butter. Once chicken is cooked (about 15 minutes), remove it. Saute the mushrooms and onions in the butter (add more if necessary). Add the soup mixture and the chicken to the pan. Cover and cook for about 25 minutes at medium heat. Serve over rice. Enjoy.


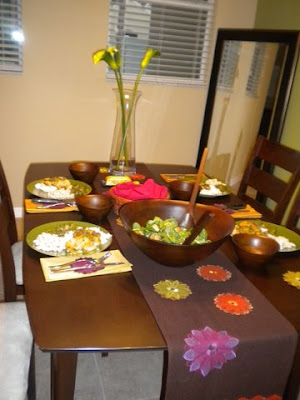
We had the privilege of being the first ones to eat at their adorable dining room table! Love my Florida friends.

Read more...

Hamburger Stroganoff

There's something about a hearty stroganoff that always makes my day better (and my husband happier). Here's a recipe I found online that is very delish and makes plenty for leftovers! Traditionally stroganoff isn't the healthiest meal, which explains why it's so scrumptious, but this recipe gives little hints on how to cut back the bad stuff without losing the flavor.

8 oz uncooked medium egg noodles
1 tsp olive oil
1 pound ground beef, extra lean
1 cup onion (chopped)
1 tsp minced garlic
1 package presliced cremini mushrooms
2 tbsp all-purpose flour
1 cup beef broth (fat-free, less sodium)
1 1/2 teaspoons kosher salt
1/8 tsp black pepper
3/4 cup reduced-fat sour cream
1 tablespoon dry sherry
3 tablespoons fresh parsley

Cook the pasta according the directions on the package. [The recipe says to leave out the salt when cooking the noodles...I say don't]. Drain and rinse under cold water.

Heat oil in a large nonstick skillet over medium-high heat. Add the beef, cook for about 4 minutes until browned, stirring to crumble. [If you don't use lean meat, you should drain it before moving on.] Add onion, garlic, and mushrooms to the pan; cook 4 minutes until most of the liquid evaporates, stirring frequently. Sprinkle with flour; cook one minute...Keep Stirring!! Don't let it burn. Stir in the broth; bring to a boil. Reduce heat, and simmer 1 minute until it starts to thicken. Stir in salt and pepper.

Remove the pan from heat. Stir in sour cream and sherry. Serve over pasta. Sprinkle with parsley.

Yield: 6 Servings

Read more...